Before You Start
Please ensure you have created your FastVirtual account and added either
Dial-Up Access
or Accelerated
Dial-Up Access to your active services.
Use the Access Number Lookup Tool
to find your local dial-up access number. You will need this, together
with your username and password, to successfully configure your connection.
Note: For optimal performance, your modem should be using the
latest drivers. For more information, please see
this FAQ.

Windows 95/98 Configuration
Note: The figures included with the following instructions represent
Windows 98. The procedures are the same for both Windows 95 and 98, except
where noted.
Windows 95: Click "Start", "Programs", "Accessories"
and "Dial-Up Networking".
Windows 98: Click "Start", "Programs", "Accessories",
"Communications" and "Dial-Up Networking".
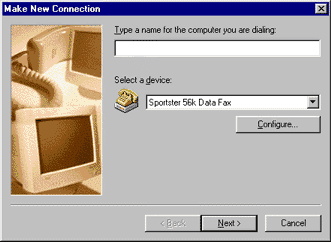
Double-click "Make New Connection". In Windows 98, click on the "Next"
button
at the Welcome screen. Windows 95 takes you directly to the following
screen. Enter a name for the connection (i.e. "FastVirtual"). Select your
modem from the drop-down list and click on the "Configure" button:
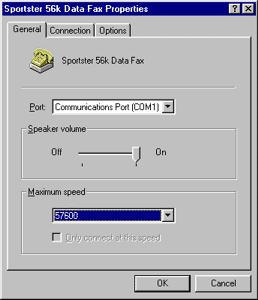
If you have a 56k, v90 or v92 modem, set the speed to 57600.
Click on the "OK" button to return to the previous screen. Click on
the "Next" button:
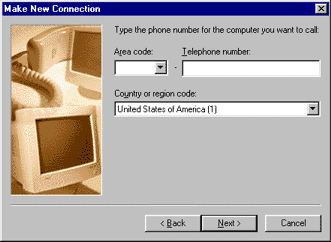
Leave the area code blank and enter your local access number in the
"Telephone number" field. For a more stable connection, add 3 or
4 commas (",,,") to the end of the number. For 10-digit dialing, enter
the area code into the phone number field instead of the area code field.
Some locations require that you dial "9" for an outside line. If your
location requires this, simply place "9,," in front of the phone number.
Remember to include 1 or 2 commas after the "9", so the modem will wait
for phone line transition before beginning to dial the number. You may
also need a comma before the number to force the modem to wait for a dial
tone.
Click on the "Next" button:
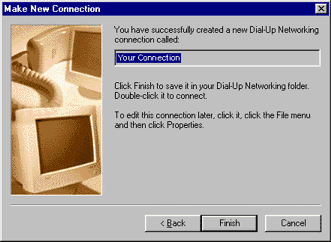
The next screen confirms the creation of your dial-up networking connection.
Click on the "Finish" button:
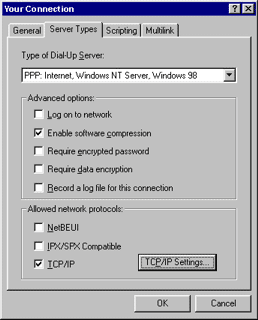
Right-click your new connection and select "Properties". When
the Properties screen appears, select the "Server Types" tab. Make
sure "PPP: Internet, Windows NT Server, Windows 98" (or 95) is selected
in the "Type of Dial-Up Server" dropdown list. Make sure the only
things checked are "Enable software compression" under "Advanced
options" and "TCP/IP" under "Allowed network protocols":
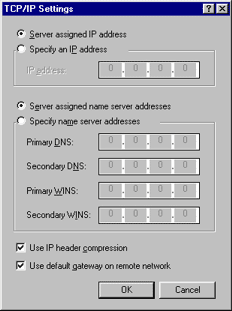
Click on the "TCP/IP Settings..." button and make sure "Server assigned IP
address" and "Server assigned name server address" are selected.
Click on the "OK" button to return to the previous screen. Click on
the "OK" button again
to close the connection properties window:
To create a shortcut to your dial-up connection on your desktop, right-click
your new dial-up connection and select "Create Shortcut". Windows
will alert you, stating that you cannot create a shortcut in the Connections
folder, and asking if you want to place this on the desktop instead. Click
on the "Yes" button, and the shortcut will appear on your desktop. Close
the dial-up networking folder.
To connect to the Internet, double-click the shortcut you created on
your desktop. Enter your username and password. If you check "Save password",
you will not need to re-enter this the next time you connect:
Note: Passwords are case-sensitive; "Password" is not
the same as "password".
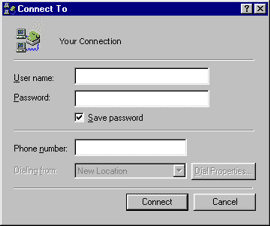
Click the "Connect" button and you're done.
|
